
5 Invisalign Tips
If you want to straighten your smile without the hassles of the traditional bracket and wire orthodontic options, Invisalign alignment tray braces may be a better solution. Invisalign clear braces offer patients a more cosmetic, comfortable alternative to traditional bracket and wire braces, but there are some aspects of this treatment that patients aren’t as familiar with. Keep reading to learn more about Invisalign and how you can master your orthodontic alignment with clear braces.
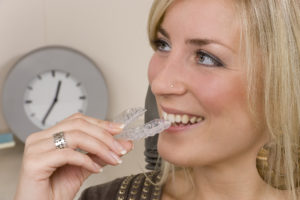
1 – Know the Parts
Before we get started talking about Invisalign, let’s discuss the components of your Invisalign plan:
- Aligners – clear plastic trays that shift teeth into position over the course of several months of treatment.
- Misfit – each set of aligners should fit slightly incorrectly. It’s these wrong parts or “misfits” that create the tooth movement. They represent the next step closer to your ideal smile alignment and will place pressure on teeth to move them into this new position.
- Attachments – these are small dabs of tooth-colored composite resin that are used to shift teeth into their ideal alignment. These attachment pieces are typically used to move teeth that are improperly positioned or facing the wrong direction.
- Buttons – are small brackets that anchor elastics. They are usually placed on the top eyetooth and bottom molar to shift the whole row of teeth.
- Elastics – rubber bands used to shift the entire bite rather than just one tooth.
2 – Brush Between Meals
Brushing teeth twice a day is always important, but when you’re undergoing Invisalign orthodontic treatment, you may also want to brush your teeth after you eat. If you simply replace your Invisalign tray, you may be trapping plaque and bacteria against the teeth and increase your risk for tooth decay and gum disease. You should also thoroughly rinse and/or brush your aligners.
3 – Attend Regular Dental Appointments
During your regular Invisalign checkups every six to eight weeks, the dentist will check the progress of your Invisalign treatment. We will also provide professional teeth cleaning to help prevent decay or damage.
4 – Clean Your Trays
Every time you brush your teeth, you should also clean your Invisalign trays. You’ll need to wear these aligners for weeks, so it’s important that you prevent the buildup of bacteria, plaque, and tartar in the aligners.
5 – What to do During an Emergency
If you experience an Invisalign emergency such as an attachment or button falling off, a tray bending or breaking, or other concerns, call a dentist right away. The longer you wait to repair the issue, the longer it will take to complete your Invisalign treatment plan.
Meet the Smiles of Valparaiso & Associates Team
At Smiles of Valparaiso & Associates in Valparaiso, we are proud to offer Invisalign orthodontic treatments. A straighter, healthier, more beautiful smile is something every patient deserves, and our skilled dentists and team can deliver picture-perfect smiles through a wide range of cosmetic, restorative, and orthodontic solutions. If you want to find out more, call our Valparaiso dental office to schedule your orthodontic and cosmetic dentistry consultation today.